 FancyVideo 模型部署教程
1 大模型 FancyVideo 介绍:
合成运动丰富且时间一致的视频仍然是人工智能领域的一项挑战,尤其是在处理较长的持续时间时。现有的文本到视频 (T2V) 模型通常采用空间交叉注意进行文本控制,等效地指导不同帧的生成而无需特定于帧的文本指导。因此,模型理解提示中传达的时间逻辑并生成具有连贯运动的视频的能力受到限制。为了解决这一限制,我们引入了 FancyVideo,这是一种创新的视频生成器,它通过精心设计的跨帧文本指导模块 (CTGM) 改进了现有的文本控制机制。具体而言,CTGM 分别在交叉注意的开始、中间和结束时结合了时间信息注入器 (TII)、时间亲和力细化器 (TAR) 和时间特征增强器 (TFB),以实现特定于帧的文本指导。首先,TII 将来自潜在特征的特定于帧的信息注入文本条件,从而获得跨帧文本条件。然后,TAR 细化跨帧文本条件和潜在特征在时间维度上的相关矩阵。最后,TFB 增强了潜在特征的时间一致性。大量包括定量和定性评估的实验证明了 FancyVideo 的有效性。我们的视频演示、代码和模型可在此 https URL上找到。
FancyVideo 开源模型旨在与开源社区一起推动大模型技术发展,恳请开发者和大家遵守开源协议,勿将开源模型和代码及基于开源项目产生的衍生物用于任何可能给国家和社会带来危害的用途以及用于任何未经过安全评估和备案的服务。目前,本项目团队未基于 FancyVideo 开源模型开发任何应用,包括网页端、安卓、苹果 iOS 及 Windows App 等应用。
尽管模型在训练的各个阶段都尽力确保数据的合规性和准确性,但由于 FancyVideo 模型规模较小,且模型受概率随机性因素影响,无法保证输出内容的准确。同时模型的输出容易被用户的输入误导。
- 本项目不承担开源模型和代码导致的数据安全、舆情风险或发生任何模型被误导、滥用、传播、不当利用而产生的风险和责任。
更多详细信息见 github官网。
2 大模型 FancyVideo 部署过程:
基础环境最低要求说明:
| 环境名称 | 版本信息1 |
|---|---|
| Ubuntu | 22.04.4 LTS |
| CUDA | 12.1 |
| Python | 3.10 |
| NVIDIA Corporation | RTX 3090 |
2.1 更新基础软件包
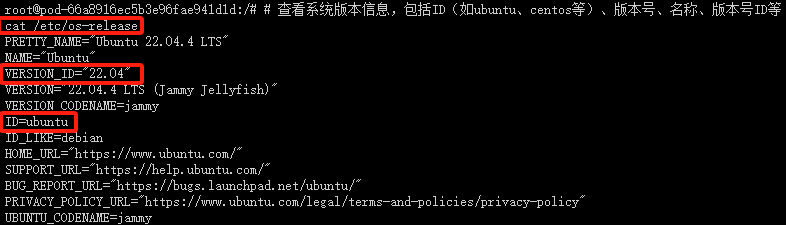
查看系统版本信息
# 查看系统版本信息,包括ID(如ubuntu、centos等)、版本号、名称、版本号ID等
cat /etc/os-release
配置 apt 国内源
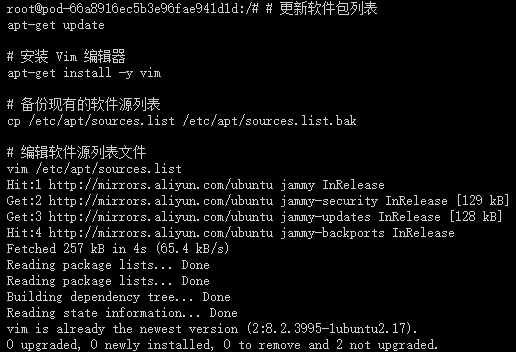
# 更新软件包列表
apt-get update
这个命令用于更新本地软件包索引。它会从所有配置的源中检索最新的软件包列表信息,但不会安装或升级任何软件包。这是安装新软件包或进行软件包升级之前的推荐步骤,因为它确保了您获取的是最新版本的软件包。
# 安装 Vim 编辑器
apt-get install -y vim
这个命令用于安装 Vim 文本编辑器。-y 选项表示自动回答所有的提示为“是”,这样在安装过程中就不需要手动确认。Vim 是一个非常强大的文本编辑器,广泛用于编程和配置文件的编辑。
为了安全起见,先备份当前的 sources.list 文件之后,再进行修改:
# 备份现有的软件源列表
cp /etc/apt/sources.list /etc/apt/sources.list.bak
这个命令将当前的 sources.list 文件复制为一个名为 sources.list.bak 的备份文件。这是一个好习惯,因为编辑 sources.list 文件时可能会出错,导致无法安装或更新软件包。有了备份,如果出现问题,您可以轻松地恢复原始的文件。
# 编辑软件源列表文件
vim /etc/apt/sources.list
这个命令使用 Vim 编辑器打开 sources.list 文件,以便您可以编辑它。这个文件包含了 APT(Advanced Package Tool)用于安装和更新软件包的软件源列表。通过编辑这个文件,您可以添加新的软件源、更改现有软件源的优先级或禁用某些软件源。
在 Vim 中,您可以使用方向键来移动光标,i 键进入插入模式(可以开始编辑文本),Esc 键退出插入模式,:wq 命令保存更改并退出 Vim,或 :q! 命令不保存更改并退出 Vim。
编辑 sources.list 文件时,请确保您了解自己在做什么,特别是如果您正在添加新的软件源。错误的源可能会导致软件包安装失败或系统安全问题。如果您不确定,最好先搜索并找到可靠的源信息,或者咨询有经验的 Linux 用户。
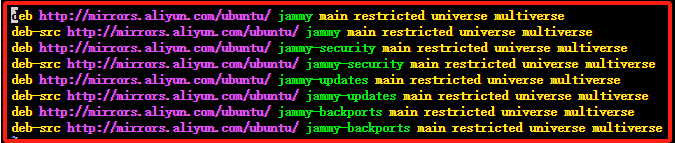
使用 Vim 编辑器打开 sources.list 文件,复制以下代码替换 sources.list里面的全部代码,配置 apt 国内阿里源。
deb http://mirrors.aliyun.com/ubuntu/ jammy main restricted universe multiverse
deb-src http://mirrors.aliyun.com/ubuntu/ jammy main restricted universe multiverse
deb http://mirrors.aliyun.com/ubuntu/ jammy-security main restricted universe multiverse
deb-src http://mirrors.aliyun.com/ubuntu/ jammy-security main restricted universe multiverse
deb http://mirrors.aliyun.com/ubuntu/ jammy-updates main restricted universe multiverse
deb-src http://mirrors.aliyun.com/ubuntu/ jammy-updates main restricted universe multiverse
deb http://mirrors.aliyun.com/ubuntu/ jammy-backports main restricted universe multiverse
deb-src http://mirrors.aliyun.com/ubuntu/ jammy-backports main restricted universe multiverse
安装常用软件和工具
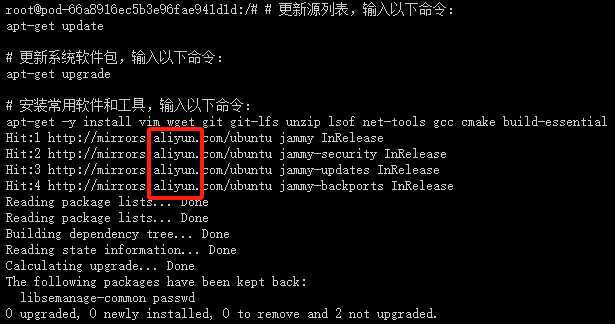
# 更新源列表,输入以下命令:
apt-get update

# 更新系统软件包,输入以下命令:
apt-get upgrade

# 安装常用软件和工具,输入以下命令:
apt-get -y install vim wget git git-lfs unzip lsof net-tools gcc cmake build-essential
出现以下页面,说明国内apt源已替换成功,且能正常安装apt软件和工具
2.2 安装 NVIDIA CUDA Toolkit 12.1
- 下载 CUDA Keyring :
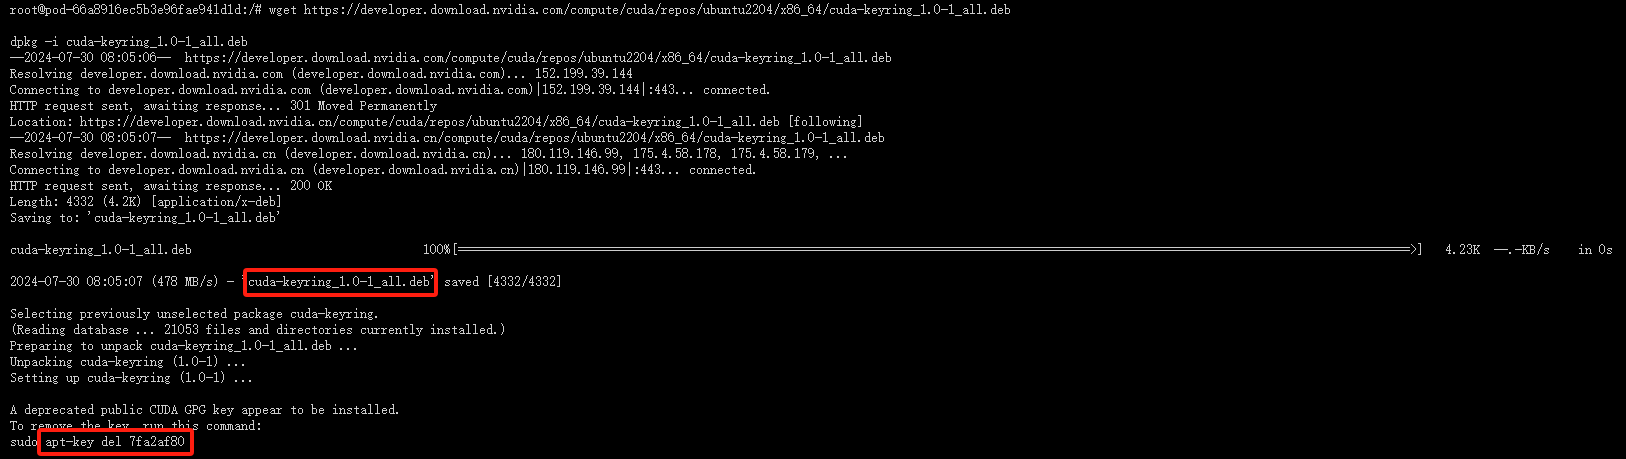
wget https://developer.download.nvidia.com/compute/cuda/repos/ubuntu2204/x86_64/cuda-keyring_1.0-1_all.deb
这个命令用于下载 CUDA 的 GPG 密钥环,它用于验证 CUDA 软件包的签名。这是确保软件包安全性的一个重要步骤。
- 安装 CUDA Keyring :
dpkg -i cuda-keyring_1.0-1_all.deb
使用 dpkg 安装下载的密钥环。这是必要的,以便 apt 能够验证从 NVIDIA 仓库下载的软件包的签名。
- 删除旧的 apt 密钥(如果必要) :
apt-key del 7fa2af80
这一步可能不是必需的,除非您知道 7fa2af80 是与 CUDA 相关的旧密钥,并且您想从系统中删除它以避免混淆。通常情况下,如果您只是安装 CUDA 并使用 NVIDIA 提供的最新密钥环,这一步可以跳过。
- 更新 apt 包列表 :
apt-get update
更新 apt 的软件包列表,以便包括刚刚通过 cuda-keyring 添加的 NVIDIA 仓库中的软件包。
- 安装 CUDA Toolkit :
apt-get -y install cuda-toolkit-12-1
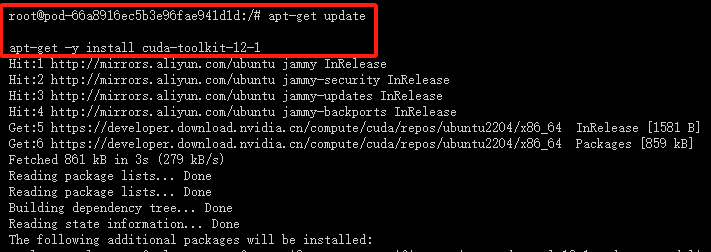
出现以下页面,说明 NVIDIA CUDA Toolkit 12.1 安装成功
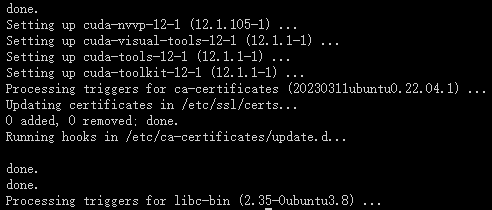
注意:这里可能有一个问题。NVIDIA 官方 Ubuntu 仓库中可能不包含直接名为 cuda-toolkit-12-1 的包。通常,您会安装一个名为 cuda 或 cuda-12-1 的元包,它会作为依赖项拉入 CUDA Toolkit 的所有组件。请检查 NVIDIA 的官方文档或仓库,以确认正确的包名。
如果您正在寻找安装特定版本的 CUDA Toolkit,您可能需要安装类似 cuda-12-1 的包(如果可用),或者从 NVIDIA 的官方网站下载 CUDA Toolkit 的 .run 安装程序进行手动安装。
请确保您查看 NVIDIA 的官方文档或 Ubuntu 的 NVIDIA CUDA 仓库以获取最准确的包名和安装指令。

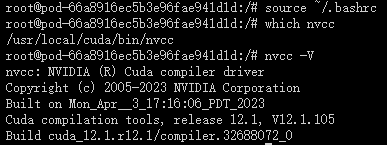
- 出现以上情况,需要配置 NVIDIA CUDA Toolkit 12.1 系统环境变量
编辑 ~/.bashrc 文件
# 编辑 ~/.bashrc 文件
vim ~/.bashrc
插入以下环境变量
# 插入以下环境变量
export PATH=/usr/local/cuda/bin:$PATH
export LD_LIBRARY_PATH=/usr/local/cuda/lib64:$LD_LIBRARY_PATH

激活 ~/.bashrc 文件
# 激活 ~/.bashrc 文件
source ~/.bashrc
查看cuda系统环境变量
which nvcc
nvcc -V
2.3 安装 Miniconda
- 下载 Miniconda 安装脚本 :
- 使用
wget命令从 Anaconda 的官方仓库下载 Miniconda 的安装脚本。Miniconda 是一个更小的 Anaconda 发行版,包含了 Anaconda 的核心组件,用于安装和管理 Python 包。
- 使用
- 运行 Miniconda 安装脚本 :
- 使用
bash命令运行下载的 Miniconda 安装脚本。这将启动 Miniconda 的安装过程。
- 使用
# 下载 Miniconda 安装脚本
wget https://repo.anaconda.com/miniconda/Miniconda3-latest-Linux-x86_64.sh

# 运行 Miniconda 安装脚本
bash Miniconda3-latest-Linux-x86_64.sh

# 初次安装需要激活 base 环境
source ~/.bashrc
按下回车键(enter)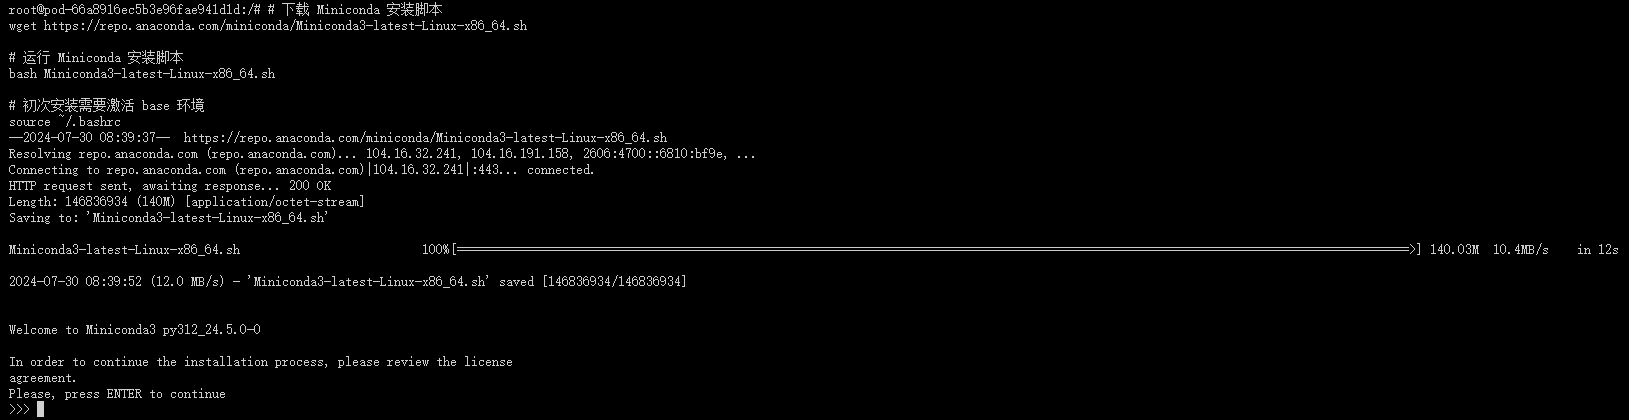
输入yes
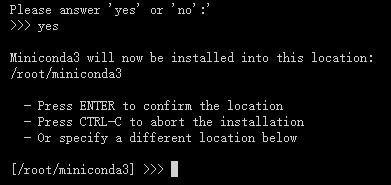
输入yes
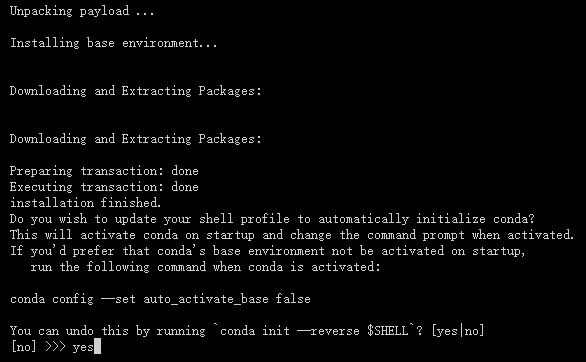
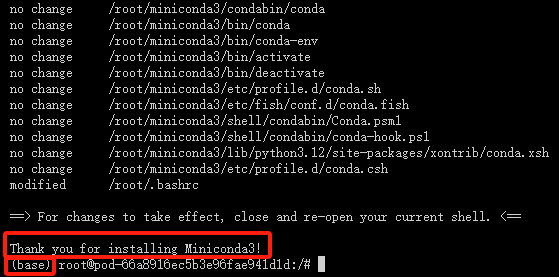
安装成功如下图所示
pip配置清华源加速
# 编辑 /etc/pip.conf 文件
vim  /etc/pip.conf
加入以下代码
[global]
index-url = https://pypi.tuna.tsinghua.edu.cn/simple
注意事项:
- 请确保您的系统是 Linux x86_64 架构,因为下载的 Miniconda 版本是为该架构设计的。
- 在运行安装脚本之前,您可能需要使用
chmod +x Miniconda3-latest-Linux-x86_64.sh命令给予脚本执行权限。 - 安装过程中,您将被提示是否同意许可协议,以及是否将 Miniconda 初始化。通常选择 "yes" 以完成安装和初始化。
- 安装完成后,您可以使用
conda命令来管理 Python 环境和包。 - 如果链接无法访问或解析失败,可能是因为网络问题或链接本身的问题。请检查网络连接,并确保链接是最新的和有效的。如果问题依旧,请访问 Anaconda 的官方网站获取最新的下载链接。
2.4 从 github 仓库 克隆项目:
- 克隆存储库:
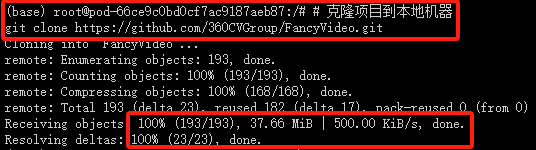
git clone https://github.com/360CVGroup/FancyVideo.git
# 克隆项目到本地机器
git clone https://github.com/360CVGroup/FancyVideo.git
如果 github 无法访问,使用 国内镜像 进行克隆
git clone https://gitee.com/empty-snow/FancyVideo.git
# 克隆 FancyVideo 项目
git clone https://gitee.com/empty-snow/FancyVideo.git
出现以上页面即是克隆项目成功!
请注意,如果 git clone https://github.com/360CVGroup/FancyVideo.git 这个链接不存在或者无效,git clone 命令将不会成功克隆项目,并且会报错。确保链接是有效的,并且您有足够的权限访问该存储库。
2.5 创建虚拟环境
# 创建一个名为'fancyvideo'的conda环境,并指定Python版本为3.10
conda create -n fancyvideo python=3.10
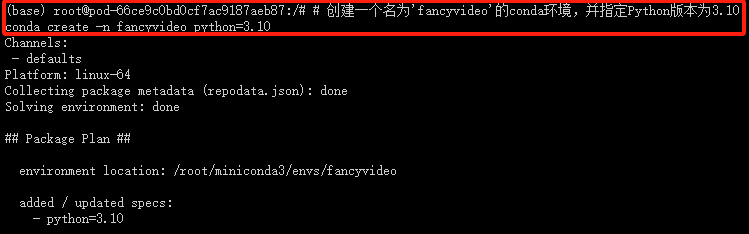
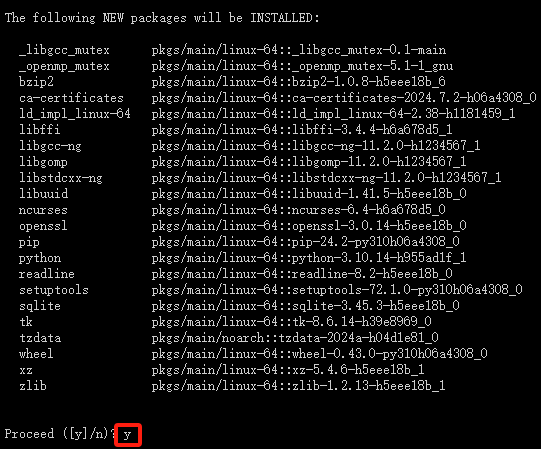
输入 y
2.6 安装模型依赖库:
- 切换到项目目录、激活虚拟环境、安装安装项目所需的Python包
# 导航到项目目录
cd FancyVideo

# 激活刚刚创建的环境
conda activate fancyvideo

# 使用pip从requirements.txt文件中安装项目所需的其他Python包
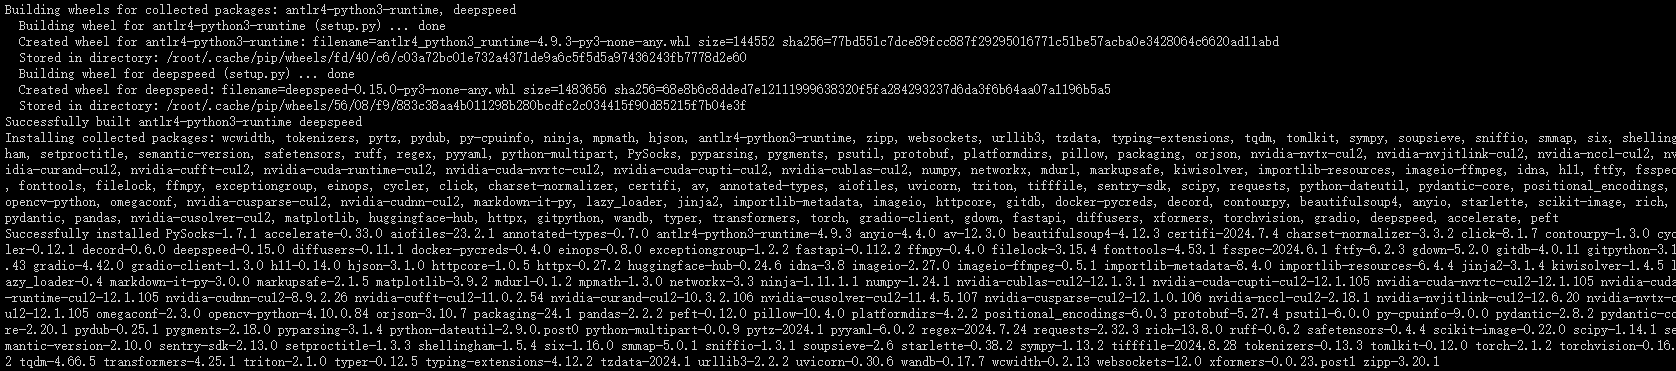
pip install -r requirements.txt
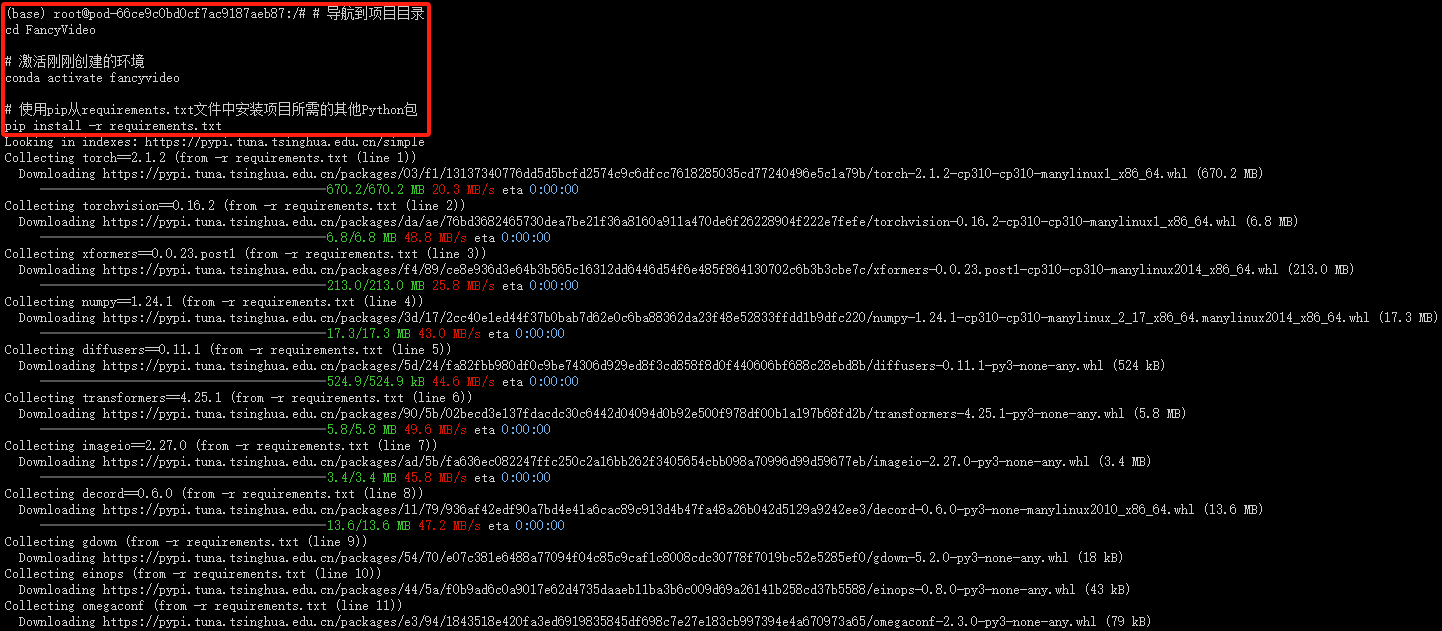
- 依赖安装成功如下图所示:
2.7 下载预训练模型:
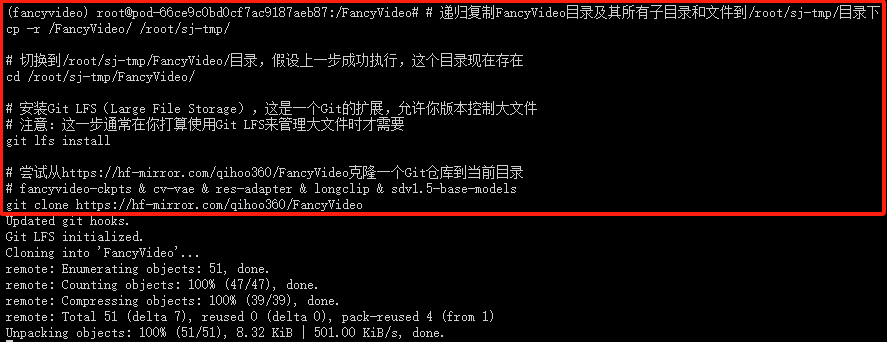
在启动应用程序之前,运行以下命令以自动下载所需的模型
# 递归复制FancyVideo目录及其所有子目录和文件到/root/sj-tmp/目录下
cp -r /FancyVideo/ /root/sj-tmp/

# 切换到/root/sj-tmp/FancyVideo/目录,假设上一步成功执行,这个目录现在存在
cd /root/sj-tmp/FancyVideo/

# 安装Git LFS(Large File Storage),这是一个Git的扩展,允许你版本控制大文件
# 注意:这一步通常在你打算使用Git LFS来管理大文件时才需要
git lfs install

# 尝试从https://hf-mirror.com/qihoo360/FancyVideo克隆一个Git仓库到当前目录
# fancyvideo-ckpts & cv-vae & res-adapter & longclip & sdv1.5-base-models
git clone https://hf-mirror.com/qihoo360/FancyVideo
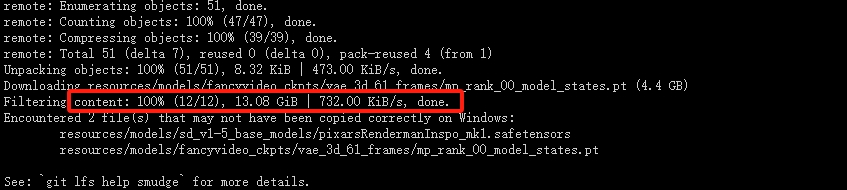
下载成功如下图
移动模型:
mv FancyVideo/resources/models resources/

继续下载模型
git lfs install
git clone https://hf-mirror.com/runwayml/stable-diffusion-v1-5 resources/models/stable-diffusion-v1-5
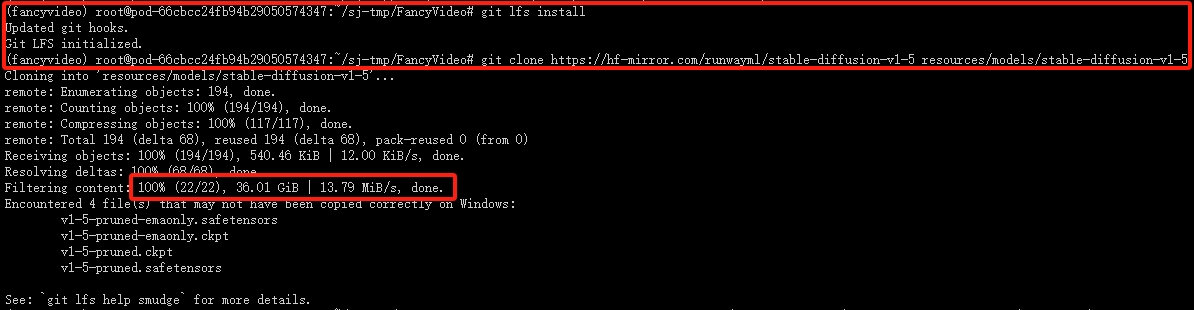
下载模型后,你的资源文件夹如下:
📦 resouces/
├── 📂 models/
│   └── 📂 fancyvideo_ckpts/
│   └── 📂 CV-VAE/
│   └── 📂 res-adapter/
│   └── 📂 LongCLIP-L/
│   └── 📂 sd_v1-5_base_models/
│   └── 📂 stable-diffusion-v1-5/
├── 📂 demos/
│   └── 📂 reference_images/
│   └── 📂 test_prompts/
2.8 运行 scripts/demo.py 文件
# 运行 scripts/demo.py 文件
CUDA_VISIBLE_DEVICES=0 PYTHONPATH=./ python scripts/demo.py --config configs/inference/i2v.yaml
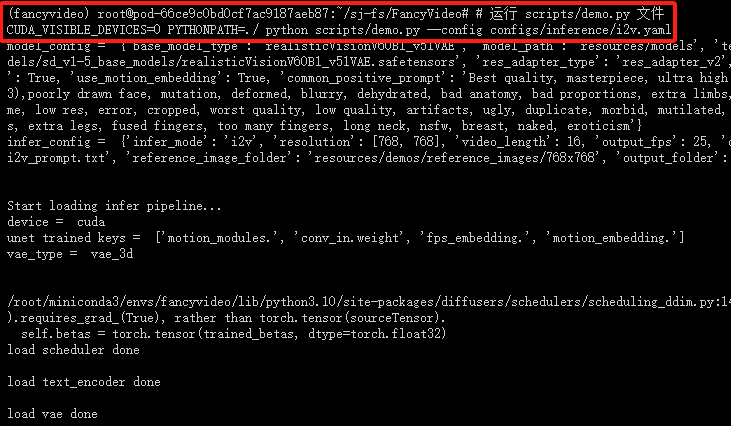
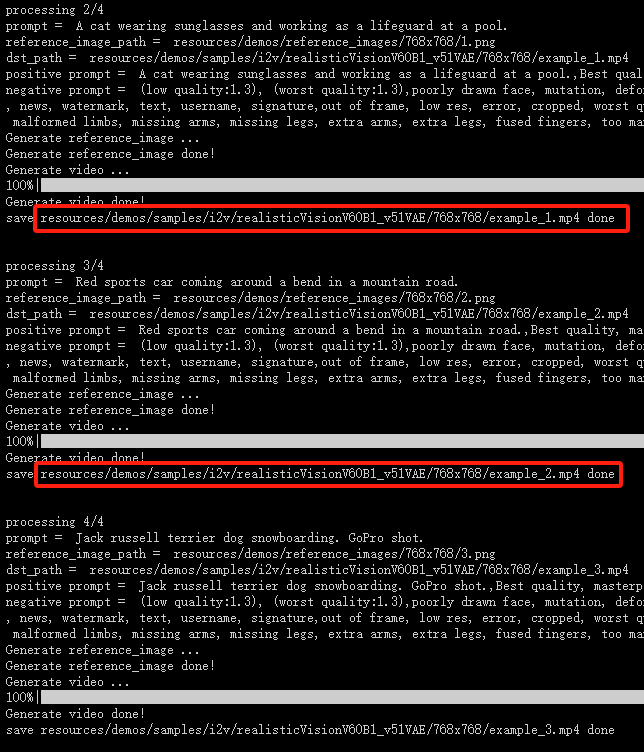
出现以下结果,说明模型已经部署成功,此官方文档没有 gradio 页面,生成的视频可以去对应文件夹查看。
2.9 从 github 仓库 克隆 app.py 文件的项目
cd configs/inference/
vim i2v_ui.yaml
插入以下代码:
model:
  base_model_type: "realisticVisionV60B1_v51VAE"
  model_path: "resources/models"
  text_to_video_mm_path: "resources/models/fancyvideo_ckpts/vae_3d_61_frames/mp_rank_00_model_states.pt"
  base_model_path: "resources/models/sd_v1-5_base_models/realisticVisionV60B1_v51VAE.safetensors"
  res_adapter_type: "res_adapter_v2"
  trained_keys: ["motion_modules.", "conv_in.weight", "fps_embedding.", "motion_embedding."]
  vae_type: "vae_3d"
  use_fps_embedding: true
  use_motion_embedding: true
  common_positive_prompt: ""
  common_negative_prompt: ""

inference:
  infer_mode: "i2v"
  resolution: [768, 768]
  video_length: 16
  output_fps: 25
  cond_fps: 25
  cond_motion_score: 3.0
  use_noise_scheduler_snr: true
  seed: 22
  prompt_path: "resources/demos/test_prompts/test_i2v_prompt.txt"
  reference_image_folder: "resources/demos/reference_images/768x768"
  output_folder: "resources/demos/samples/i2v/realisticVisionV60B1_v51VAE/768x768"
保存文件:Esc --》Shift + :--》输入英文的 :--》输入:wq
vim t2v_ui.yaml
插入以下代码:
model:
  base_model_type: "realcartoon3d_v15"
  model_path: "resources/models"
  text_to_video_mm_path: "resources/models/fancyvideo_ckpts/vae_3d_61_frames/mp_rank_00_model_states.pt"
  base_model_path: "resources/models/sd_v1-5_base_models/realcartoon3d_v15.safetensors"
  res_adapter_type: "res_adapter_v2"
  trained_keys: ["motion_modules.", "conv_in.weight", "fps_embedding.", "motion_embedding."]
  vae_type: "vae_3d"
  use_fps_embedding: true
  use_motion_embedding: true
  common_positive_prompt: ""
  common_negative_prompt: ""

inference:
  infer_mode: "t2v"
  resolution: [768, 768]
  video_length: 16
  output_fps: 25
  cond_fps: 25
  cond_motion_score: 3.0
  use_noise_scheduler_snr: true
  seed: 22
  prompt_path: "resources/demos/test_prompts/realcartoon3d_v15.txt"
  reference_image_folder: "resources/demos/reference_images/768x768"
  output_folder: "resources/demos/samples/t2v/realcartoon3d_v15/768x768"
cd /root/sj-tmp/FancyVideo/
vim app.py
插入以下代码:
import os
import torch
import yaml
import json
import gradio as gr
from skimage import img_as_ubyte
from datetime import datetime
from fancyvideo.pipelines.fancyvideo_infer_pipeline import InferPipeline
import safetensors.torch as safetensors

# use GPU
device = torch.device("cuda" if torch.cuda.is_available() else "cpu")

SETTINGS_PATH = "resources/settings/"
if not os.path.exists(SETTINGS_PATH):
    os.makedirs(SETTINGS_PATH)

def save_settings(mode, settings):
    file_path = os.path.join(SETTINGS_PATH, f"{mode}_settings.json")
    with open(file_path, "w") as f:
        json.dump(settings, f, indent=4)

def load_settings(mode):
    file_path = os.path.join(SETTINGS_PATH, f"{mode}_settings.json")
    if os.path.exists(file_path):
        with open(file_path, "r") as f:
            return json.load(f)
    return {}

def parse_lora(text_prompt):
    if "<lora:" in text_prompt:
        start_index = text_prompt.find("<lora:") + len("<lora:")
        end_index = text_prompt.find(">", start_index)
        lora_data = text_prompt[start_index:end_index].split(":")
        if len(lora_data) == 3:
            lora_filename, weight = lora_data[1], lora_data[2]
            lora_path = os.path.join("resources/models/lora/", lora_filename + ".safetensors")
            if os.path.exists(lora_path):
                return lora_path, float(weight)
    return None, None

def apply_lora_to_model(model, lora_path, lora_weight):
    lora_weights = safetensors.load_file(lora_path)
    for name, param in model.named_parameters():
        if name in lora_weights:
            param.data += lora_weights[name].to(device) * lora_weight

def run_inference(infer_mode, settings, image=None, text_prompt=None, common_negative_prompt="", resolution="768x768", base_model_file=None, use_fps_embedding=True, use_motion_embedding=True, video_length=16, output_fps=25, cond_fps=25, cond_motion_score=3.0, use_noise_scheduler_snr=True, seed=22):
    config_file = "configs/inference/i2v_ui.yaml" if infer_mode == "i2v" else "configs/inference/t2v_ui.yaml"

    with open(config_file, "r") as fp:
        config = yaml.safe_load(fp)

    model_config = config.get("model", "")
    infer_config = config.get("inference", "")

    if base_model_file:
        base_model_path = os.path.join("resources/models/sd_v1-5_base_models", base_model_file)

    lora_path, lora_weight = parse_lora(text_prompt)
    if lora_path:
        model_config["lora_model_path"] = lora_path
        model_config["lora_weight"] = lora_weight
        pipeline = load_stable_diffusion_model()
        apply_lora_to_model(pipeline, lora_path, lora_weight)

    text_to_video_mm_path = settings.get("text_to_video_mm_path", "resources/models/fancyvideo_ckpts/vae_3d_61_frames/mp_rank_00_model_states.pt")
    res_adapter_type = settings.get("res_adapter_type", "res_adapter_v2")
    trained_keys = settings.get("trained_keys", ["motion_modules.", "conv_in.weight", "fps_embedding.", "motion_embedding."])
    model_path = settings.get("model_path", "resources/models")
    vae_type = settings.get("vae_type", "vae_3d")

    resolution_values = [int(x) for x in resolution.split("x")]

    infer_pipeline = InferPipeline(
        text_to_video_mm_path=text_to_video_mm_path,
        base_model_path=base_model_path,
        res_adapter_type=res_adapter_type,
        trained_keys=trained_keys,
        model_path=model_path,
        vae_type=vae_type,
        use_fps_embedding=use_fps_embedding,
        use_motion_embedding=use_motion_embedding,
        common_negative_prompt=common_negative_prompt,
    )

    output_folder = "resources/demos/samples/i2v/" if infer_mode == "i2v" else "resources/demos/samples/t2v/"
    if not os.path.exists(output_folder):
        os.makedirs(output_folder, exist_ok=True)

    prompt = text_prompt if text_prompt else " "
    reference_image_path = ""

    if infer_mode == "i2v" and image is not None:
        reference_image_path = os.path.join(output_folder, "input_image.png")
        image.save(reference_image_path)

    current_time = datetime.now().strftime("%Y%m%d_%H%M")
    dst_path = os.path.join(output_folder, f"output_video_{current_time}.mp4")

    reference_image, video, prompt = infer_pipeline.t2v_process_one_prompt(
        prompt=prompt,
        reference_image_path=reference_image_path,
        seed=seed,
        video_length=video_length,
        resolution=resolution_values,
        use_noise_scheduler_snr=use_noise_scheduler_snr,
        fps=cond_fps,
        motion_score=cond_motion_score,
    )

    frame_list = []
    for frame in video:
        frame = img_as_ubyte(frame.to(device).cpu().permute(1, 2, 0).float().detach().numpy())
        frame_list.append(frame)

    infer_pipeline.save_video(frame_list=frame_list, fps=output_fps, dst_path=dst_path)

    settings = {
        "text_prompt": text_prompt,
        "common_negative_prompt": common_negative_prompt,
        "resolution": resolution,
        "base_model_file": base_model_file,
        "use_fps_embedding": use_fps_embedding,
        "use_motion_embedding": use_motion_embedding,
        "video_length": video_length,
        "output_fps": output_fps,
        "cond_fps": cond_fps,
        "cond_motion_score": cond_motion_score,
        "use_noise_scheduler_snr": use_noise_scheduler_snr,
        "seed": seed,
        "text_to_video_mm_path": text_to_video_mm_path,
        "res_adapter_type": res_adapter_type,
        "trained_keys": trained_keys,
        "model_path": model_path,
        "vae_type": vae_type,
    }
    save_settings(infer_mode, settings)

    return dst_path

def image_to_video(image, text_prompt, common_negative_prompt, resolution, base_model_file, use_fps_embedding, use_motion_embedding, video_length, output_fps, cond_fps, cond_motion_score, use_noise_scheduler_snr, seed):
    settings = load_settings("i2v")
    return run_inference("i2v", settings=settings, image=image, text_prompt=text_prompt, common_negative_prompt=common_negative_prompt, resolution=resolution, base_model_file=base_model_file, use_fps_embedding=use_fps_embedding, use_motion_embedding=use_motion_embedding, video_length=video_length, output_fps=output_fps, cond_fps=cond_fps, cond_motion_score=cond_motion_score, use_noise_scheduler_snr=use_noise_scheduler_snr, seed=seed)

def text_to_video(text_prompt, common_negative_prompt, resolution, base_model_file, use_fps_embedding, use_motion_embedding, video_length, output_fps, cond_fps, cond_motion_score, use_noise_scheduler_snr, seed):
    settings = load_settings("t2v")
    return run_inference("t2v", settings=settings, text_prompt=text_prompt, common_negative_prompt=common_negative_prompt, resolution=resolution, base_model_file=base_model_file, use_fps_embedding=use_fps_embedding, use_motion_embedding=use_motion_embedding, video_length=video_length, output_fps=output_fps, cond_fps=cond_fps, cond_motion_score=cond_motion_score, use_noise_scheduler_snr=use_noise_scheduler_snr, seed=seed)

def get_base_model_files():
    path = "resources/models/sd_v1-5_base_models/"
    if os.path.exists(path):
        return [f for f in os.listdir(path) if f.endswith(".safetensors")]
    return []

def get_generated_videos(filter_mode="all"):
    videos = []
    paths = {
        "i2v": "resources/demos/samples/i2v/",
        "t2v": "resources/demos/samples/t2v/"
    }
    if filter_mode in paths:
        path = paths[filter_mode]
        if os.path.exists(path):
            for file in os.listdir(path):
                if file.endswith(".mp4"):
                    videos.append(os.path.join(path, file))
    else:
        for path in paths.values():
            if os.path.exists(path):
                for file in os.listdir(path):
                    if file.endswith(".mp4"):
                        videos.append(os.path.join(path, file))
    return videos

def update_gallery(filter_mode="all"):
    return get_generated_videos(filter_mode)

def get_settings_from_ui():
    return {
        "text_to_video_mm_path": text_to_video_mm_path.value,
        "res_adapter_type": res_adapter_type.value,
        "trained_keys": json.loads(trained_keys.value),
        "model_path": model_path.value,
        "vae_type": vae_type.value
    }

def save_settings_from_ui():
    settings = get_settings_from_ui()
    save_settings("current", settings)

def load_settings_into_ui():
    settings = load_settings("current")
    if settings:
        text_to_video_mm_path.value = settings.get("text_to_video_mm_path", text_to_video_mm_path.value)
        res_adapter_type.value = settings.get("res_adapter_type", res_adapter_type.value)
        trained_keys.value = json.dumps(settings.get("trained_keys", json.loads(trained_keys.value)))
        model_path.value = settings.get("model_path", model_path.value)
        vae_type.value = settings.get("vae_type", vae_type.value)

text_to_video_mm_path = gr.Textbox(label="Text-to-Video Model Path", value="resources/models/fancyvideo_ckpts/vae_3d_61_frames/mp_rank_00_model_states.pt")
res_adapter_type = gr.Textbox(label="Res Adapter Type", value="res_adapter_v2")
trained_keys = gr.Textbox(label="Trained Keys", value=json.dumps(["motion_modules.", "conv_in.weight", "fps_embedding.", "motion_embedding."]))
model_path = gr.Textbox(label="Model Path", value="resources/models")
vae_type = gr.Textbox(label="VAE Type", value="vae_3d")

ui_settings = [
    text_to_video_mm_path,
    res_adapter_type,
    trained_keys,
    model_path,
    vae_type,
]

with gr.Blocks() as demo:
    base_model_files = get_base_model_files()
    i2v_settings = load_settings("i2v")
    t2v_settings = load_settings("t2v")

    with gr.Tab("Image to Video"):
        with gr.Row():
            with gr.Column(scale=1):
                base_model_dropdown = gr.Dropdown(
                    label="Select Base Model",
                    choices=base_model_files,
                    value=i2v_settings.get("base_model_file", "")
                )
                image_input = gr.Image(label="Upload an Image", type="pil")
                text_input_image = gr.Textbox(
                    label="Enter a Text Prompt for Image to Video",
                    value=i2v_settings.get("text_prompt", "")
                )
                common_negative_prompt_input_image = gr.Textbox(
                    label="Enter a Common Negative Prompt",
                    value=i2v_settings.get("common_negative_prompt", "")
                )
                resolution_dropdown_image = gr.Dropdown(
                    label="Resolution", choices=["768x768", "512x512", "1024x1024", "1024x768", "768x1024"],
                    value=i2v_settings.get("resolution", "768x768")
                )
                use_fps_embedding_input = gr.Checkbox(
                    label="Use FPS Embedding",
                    value=i2v_settings.get("use_fps_embedding", True)
                )
                use_motion_embedding_input = gr.Checkbox(
                    label="Use Motion Embedding",
                    value=i2v_settings.get("use_motion_embedding", True)
                )
                video_length_input = gr.Slider(
                    label="Video Length",
                    minimum=1,
                    maximum=30,
                    value=i2v_settings.get("video_length", 16),
                    step=1
                )
                output_fps_input = gr.Slider(
                    label="Output FPS",
                    minimum=1,
                    maximum=60,
                    value=i2v_settings.get("output_fps", 25),
                    step=1
                )
                cond_fps_input = gr.Slider(
                    label="Conditioning FPS",
                    minimum=1,
                    maximum=60,
                    value=i2v_settings.get("cond_fps", 25),
                    step=1
                )
                cond_motion_score_input = gr.Slider(
                    label="Motion Score",
                    minimum=0.0,
                    maximum=10.0,
                    value=i2v_settings.get("cond_motion_score", 3.0),
                    step=0.1
                )
                use_noise_scheduler_snr_input = gr.Checkbox(
                    label="Use Noise Scheduler SNR",
                    value=i2v_settings.get("use_noise_scheduler_snr", True)
                )
                seed_input = gr.Number(
                    label="Seed",
                    value=i2v_settings.get("seed", 22)
                )

                image_button = gr.Button("Generate Video")

            with gr.Column(scale=2):
                image_output = gr.Video()

        image_button.click(
            fn=image_to_video,
            inputs=[
                image_input, text_input_image, common_negative_prompt_input_image, resolution_dropdown_image, base_model_dropdown, use_fps_embedding_input,
                use_motion_embedding_input, video_length_input, output_fps_input, cond_fps_input,
                cond_motion_score_input, use_noise_scheduler_snr_input, seed_input
            ],
            outputs=image_output
        )

    with gr.Tab("Text to Video"):
        with gr.Row():
            with gr.Column(scale=1):
                base_model_dropdown_text = gr.Dropdown(
                    label="Select Base Model",
                    choices=base_model_files,
                    value=t2v_settings.get("base_model_file", "")
                )
                text_input = gr.Textbox(
                    label="Enter a Text Prompt",
                    value=t2v_settings.get("text_prompt", "")
                )
                common_negative_prompt_input = gr.Textbox(
                    label="Enter a Common Negative Prompt",
                    value=t2v_settings.get("common_negative_prompt", "")
                )
                resolution_dropdown_text = gr.Dropdown(
                    label="Resolution", choices=["768x768", "512x512", "1024x1024", "1024x768", "768x1024"],
                    value=t2v_settings.get("resolution", "768x768")
                )
                use_fps_embedding_input_text = gr.Checkbox(
                    label="Use FPS Embedding",
                    value=t2v_settings.get("use_fps_embedding", True)
                )
                use_motion_embedding_input_text = gr.Checkbox(
                    label="Use Motion Embedding",
                    value=t2v_settings.get("use_motion_embedding", True)
                )
                video_length_input_text = gr.Slider(
                    label="Video Length",
                    minimum=1,
                    maximum=30,
                    value=t2v_settings.get("video_length", 16),
                    step=1
                )
                output_fps_input_text = gr.Slider(
                    label="Output FPS",
                    minimum=1,
                    maximum=60,
                    value=t2v_settings.get("output_fps", 25),
                    step=1
                )
                cond_fps_input_text = gr.Slider(
                    label="Conditioning FPS",
                    minimum=1,
                    maximum=60,
                    value=t2v_settings.get("cond_fps", 25),
                    step=1
                )
                cond_motion_score_input_text = gr.Slider(
                    label="Motion Score",
                    minimum=0.0,
                    maximum=10.0,
                    value=t2v_settings.get("cond_motion_score", 3.0),
                    step=0.1
                )
                use_noise_scheduler_snr_input_text = gr.Checkbox(
                    label="Use Noise Scheduler SNR",
                    value=t2v_settings.get("use_noise_scheduler_snr", True)
                )
                seed_input_text = gr.Number(
                    label="Seed",
                    value=t2v_settings.get("seed", 22)
                )

                text_button = gr.Button("Generate Video")

            with gr.Column(scale=2):
                text_output = gr.Video()

        text_button.click(
            fn=text_to_video,
            inputs=[
                text_input, common_negative_prompt_input, resolution_dropdown_text, base_model_dropdown_text, use_fps_embedding_input_text,
                use_motion_embedding_input_text, video_length_input_text, output_fps_input_text,
                cond_fps_input_text, cond_motion_score_input_text, use_noise_scheduler_snr_input_text, seed_input_text
            ],
            outputs=text_output
        )

    with gr.Tab("Settings"):
        text_to_video_mm_path = gr.Textbox(
            label="Text to Video MM Path",
            value="resources/models/fancyvideo_ckpts/vae_3d_61_frames/mp_rank_00_model_states.pt"
        )
        res_adapter_type = gr.Textbox(
            label="Res Adapter Type",
            value="res_adapter_v2"
        )
        trained_keys = gr.Textbox(
            label="Trained Keys",
            value='["motion_modules.", "conv_in.weight", "fps_embedding.", "motion_embedding."]'
        )
        model_path = gr.Textbox(
            label="Model Path",
            value="resources/models"
        )
        vae_type = gr.Textbox(
            label="VAE Type",
            value="vae_3d"
        )
        save_settings_button = gr.Button("Save Settings")

        def save_settings_from_ui():
            settings = {
                "text_to_video_mm_path": text_to_video_mm_path.value,
                "res_adapter_type": res_adapter_type.value,
                "trained_keys": json.loads(trained_keys.value),
                "model_path": model_path.value,
                "vae_type": vae_type.value,
            }
            save_settings("default", settings)

        save_settings_button.click(
            fn=save_settings_from_ui,
            inputs=[],
            outputs=[]
        )

    with gr.Tab("Gallery"):
        filter_mode = gr.Dropdown(
            label="Filter Videos By",
            choices=["All", "Image to Video", "Text to Video"],
            value="All"
        )
        refresh_button = gr.Button("Refresh Gallery")
        video_gallery = gr.Gallery(
            label="Generated Videos",
            elem_id="video_gallery"
        )  # إزالة style

        filter_mode.change(
            fn=update_gallery,
            inputs=filter_mode,
            outputs=video_gallery
        )

        refresh_button.click(
            fn=update_gallery,
            inputs=filter_mode,
            outputs=video_gallery
        )

demo.launch(server_name="0.0.0.0", server_port=8080, share=False)
运行 app.py 文件
# 导航到项目目录
cd /root/sj-tmp/FancyVideo/

# 激活 fancyvideo 虚拟环境
conda activate fancyvideo

# 运行 app.py 文件
python app.py
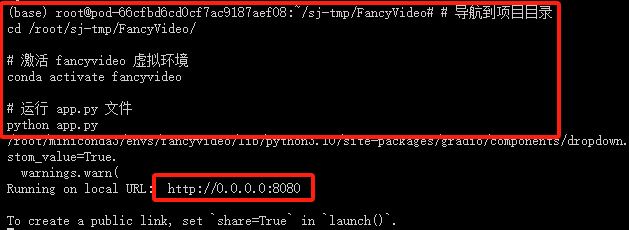
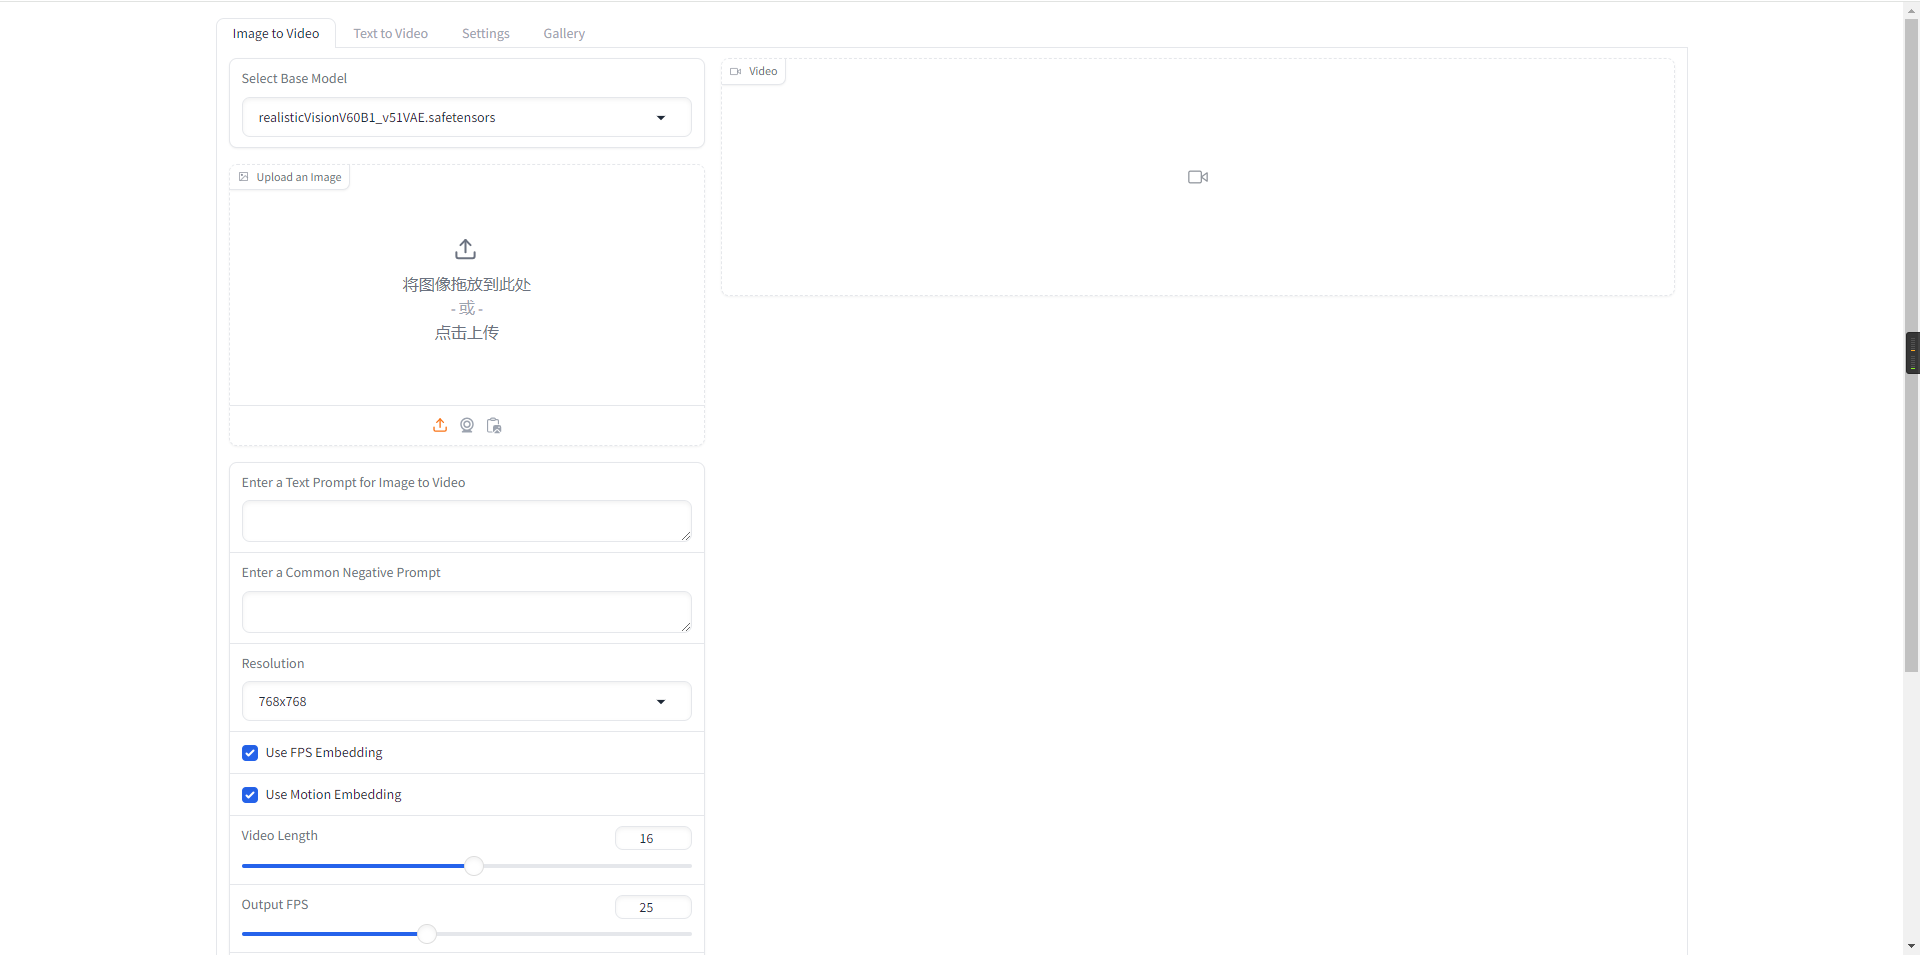
出现以下 gradio 页面,说明模型和网页都已部署成功
点击此处 ,立即体验FancyVideo!

CSDN号

官方抖音号

B站官方号

官方公众号

官方客服号

